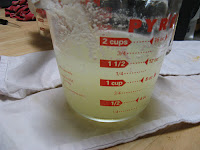
Now that I have fresh ricotta, I have to come up with some new recipes. The only recipe for which I've used ricotta in the past is lasagna, however I've usually used the cheaper cottage cheese. One evening I served a bowl of fresh ricotta and some blackberry jam. Mixing the two, my son commented that it had a cheesecake flavor. Back to my computer I went looking for a good cheesecake recipe that uses ricotta.
I found it at allrecipes.com: Italian Cream Cheese and Ricotta Cheesecake. Because my husband has to eat gluten free, I adjusted it a bit. I had some thick, firm homemade sour cream that I used instead of the required cream cheese and also substituted the sour cream at the end of the recipe with strained yogurt. I also made a smaller recipe for a pie plate instead of a spring form pan. (I rarely make a recipe exactly as it appears. If you want to see the original version, check out the link.)
Italian Ricotta Cheesecake -- Gluten free
Ingredients
8 oz. cream cheese
8 oz. homemade ricotta cheese (or store-bought)
3/4 c. white sugar
2 eggs
1 1/2 t. lemon juice
1/2 t. vanilla
2 T. cornstarch
1 T. gluten-free flour (I use Bob's Red Mill all-purpose flour substitute.)
1/8 t. xanthan gum
1 c. sour cream
1/4 c. butter, melted and cooled (which I forgot to add)
Directions
1. Preheat oven to 350 degrees. Lightly grease a 9 inch pie plate.
2. Mix the cream cheese and ricotta cheese together in a mixing bowl until well combined. Stir in the sugar, eggs, lemon juice, vanilla, cornstarch, flour, and butter. Add the sour cream last.
3. Pour the mixture into the prepared pan.
4. Bake in the preheated oven 1 hour; turn the oven off and leave in the oven 1 hour longer. Allow to cool completely in refrigerator before serving. Serve with your favorite fruit toppings.
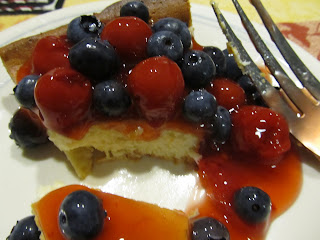
If you go to the allrecipes link, you can read other comments by other cooks. This turned out to be a deliciously light dessert. Though I love graham cracker crusts, this is a good crustless version. We served it with cherries and blueberries.
Try it, you'll like it!
Saturday, August 4, 2012
Three Cheese Experiments
Below are my three experiments, continuing my adventures with milk. The first was exactly by the recipe that I found on the "Chef in You" website.
Ricotta Cheese #1
Ingredients
2 quarts whole milk (I didn't use organic as the website suggests)
1 cup whipping cream (again, not organic)
3 Tbsp white vinegar
1/2 tsp salt
Directions
1. In a heavy saucepan, combine mile and cream. Warm in moderately high heat until the surface becomes foamy and steamy and a thermometer reads 180 - 185 degrees. Don't let the milk boil.
2. Remove the pot from the heat. Add the vinegar and stir gently for 30 seconds; the mixture will curdle almost immediately. Add the salt and stir for 30 seconds longer.
3. Cover the pot with a clean towel and let stand at room temperature for 2 hours.
4. Line a colander with several layers of cheesecloth, allowing several inches of overhang. (Note: I didn't have "butter muslin," just the cheap grocery store stuff. The weave is far too loose and the curds and why ran through. A cotton tea towel worked much better.)
5. Using a slotted spoon, transfer the curds to the colander. (Note: It would take far too much time to spoon a half gallon of stuff into a colander. Using a metal mesh colander and a tea towel set over a large bowl, I simply poured it all over the towel/colander set-up.)
6. Let the ricotta stand, stirring occasionally. I let mine sit for a couple of hours, squeezing the liquid out every now and then. When you're satisfied with the consistency of the cheese, it is ready and can be refrigerated. It will last at least 4 days.
The next cheese experiment occurred because I had a batch of yogurt that didn't set. I tried the suggestion from another website and let it incubate a little longer. Still no yogurt. Thankfully, this yogurt maker had a further suggestion for using failed yogurt.
Ricotta Cheese #2
Ingredients
1 quart of "failed" yogurt
Directions
1. Heat the yogurt until the white curd is visibly separating from the greenish, watery whey.
2. Set a colander over a bowl and line with a towel.
3. Pour the entire contents, "curds and whey," into the colander.
4. Allow the cheese to drain for a couple of hours. As with the cheese above, I occasionally stirred the mixture and squeezed the liquid out.
5. Refrigerate and use.
Since I was spending the morning in the kitchen, I thought I might as well give a little time for experimenting, as opposed to following any specific recipe. I really don't know what you would call the result. It was like a super-thick sour cream/cream cheese/quark kind of thing.
Not-Ricotta Experiment
Ingredients
1 quart whey strained from the week's batches of yogurt
1 cup heavy whipping cream
3/4 cup yogurt that didn't set right.
1 T. vinegar
Directions
After incubating it for a while longer, I reheated the mixture to 190 degrees and added the vinegar. Like the other ricotta recipes, I let it set for a couple of hours before pouring it in a colander/ tea towel set up. The whey drained out, leaving sour cream. It got pretty think, and was really delicious.
More Deliciousness -- Ricotta Cheese
This has turned out to be a dairy-oriented summer for us!
It started with digging out our old yogurt makers and using them for making fresh yogurt for my family. We also decided that we like to strain our yogurt so that it would be thicker. Store-bought yogurt has thickeners (pectin or gelatin), and some of our batches with skim milk turned out pretty runny. Whole milk makes a much thicker yogurt.
Straining the yogurt gave us a significant amount of whey. I wondered, "Does this stuff have any nutritional value?" and "What should I do with it?" One website, Livestrong, gave instructions for making ricotta cheese with the whey leftover from the strained yogurt. I tried these instructions twice, and it failed both times. But that got me thinking (which I do on a frequent basis, anyway). "Is there another way to simply make ricotta cheese?" And, viola! I found multiple recipes on-line.
Before I explain this wonderful process, let me explain what whey is to other novices like myself. In yougurt and cheese making, two main proteins exist: whey and casein. The liquid that separates from the yogurt is whey. The uninitiated, like me a little while back, think that when they see this on the top of commercial yogurt that it's a sign that it is going bad. While some pout this down the drain, yogurt whey contains all of the vital amino acids that make a protein "complete." It also contains calcium, potassium and vitamin B-12.
Now to my ricotta cheese experiments. One morning, armed with whole milk, cream, vinegar, whey, and yogurt, I put my hand to making my own soft cheese in my own kitchen.
Subscribe to:
Posts (Atom)
It's OK to be Sad
It's OK to be sad. It's OK to feel lonely. It's OK to be angry. The Lord gives no injunctions against these emotions; he only ...
-
This year, my garden has blessed me with a plethora of cucumbers. If I was a pickler, I'd be pretty happy. But I'm not. As a kid...
-
In 9th grade I moved from one small Iowan community to another. Each town had its own gathering places for teens. Leaving Charles City fo...
-
All my life I’ve wanted to go to England. As a little girl I’d put on a fake British accent. In college, as an English major, I devoured B...